
At present WordPress is considered as the most widely used platform that power up thousands of blogs and websites and being employed by thousands of people on daily basis. This is usually because of its easy interface and giving the simplicity to employ plugins for extensive support and operability. Furthermore, users can also employ millions of premium and free WordPress themes for making your site look awesome in each and every aspect.
Also, WordPress supports properly designed themes which users can use to design their website. It also gives simple drag-and-drop options to add widgets on the site. Also, you can include customization codes and improve the features as per your need and understanding. If you wish to install WordPress manually on your web server, despite which hosting you are making use. In this tutorial, we will tell you the overall process that you need to follow for manually install WordPress on any web-host.
Why Install WordPress Manually?
WordPress was originally built as a major blogging platform and now it has become commonly used platform as a CMS. You may have automatic installation of famous apps, like WordPress accessible through your webhost – Scriptaculous and Fantastico are usual examples of these services. We suggest not employing these because some big reasons. Thus installing WordPress manually gives you the advantages of empowerment.
Benefits of installing WordPress manually
Well there are several benefits of doing the same but the most important benefits are –
- You get experience and practical knowledge.
- You get to know about the different software WordPress makes use for keeping it going.
- You receive further control over your WordPress installation.
- This is helpful when you want to shift your website into another hosting service provider.
What are the Steps?
We will separate the entire procedure into a number of steps which have to be performed chronologically.
Step 1: Build WordPress database and user
Step 2: Upload WordPress
Step 2: Install WordPress
Step 1: Build WordPress database and user
To do the same, you will require the access of cPanel of you web-hosting account. Basically, WordPress saves all the vital information in a database. Typically, a database can be considered as a complete storage house for the entire content a visitor sees on your site. It keeps the plugins, WordPress Themes, text files etc. For keeping the data you’ll require creating a database which you can do with the use of below mentioned process –
- First of all you will need to log-in to your website’s cPanel.
- Generally, this is a MySQL Database Wizard underneath the Database area. Simply click on this option. You need to note down the mentioned information is an individual text-file because this will be useful in upcoming steps.
- Build a Database and type the name of the database. Click on the Next-step.
- Make Database Users and then type the password and username, click on the Create User option.
- Now just add the user into the Database. Afterwards, you’ll be directed to the privileges alternative. Choose the options as per your requirements. If you’re making an admin account then choose all the privileges. Though, if creating a user-account for a worker, you can limit him by giving fewer rights.
- Keep a note of the information mentioned above consisting of the name of the database, username and password in an individual text-file and save the file in a safe folder.
Step 2: Add user into the Database
This is actually the last step of building the WordPress database to use. A database user and a fresh database are made in the final 2 steps. In this final step, we are going to allot some rights to that user for using that particular database. You will just need to check the All-privileges checkbox and after that all the privileges will be ticked. Now click on the Next step for finishing the procedure. You will get the confirmation message afterwards. Therefore we have now important information.
- explorin_manl: Database name
- explorin_manlu: Database user
- #27EBLv=KFTS: Database user’s password
Upload WordPress into your Chosen webHost
Well, we suppose that we are ready to go ahead. And from hereon we can take two to three different steps to go ahead along with the manual set up of WordPress.
Either you can directly extract .zip file and change wp-config file, and upload overall WordPress folder for rooting your domain (Public_html), or also you can employ file manager of cPanel to extract and change the wp-config file’s content. Well, the single steps which is required here and that is changing the content of wp-config file and upload it to the suitable folder on your FTP. Also, you can make use of the FTP client such as FileZilla, to do the same. However for keeping this guide simple and easy, we will be making use of Web hosting cPanel. The cPanel window for Godaddy will change somewhat, however comparatively, steps are the same.
Upload WordPress into your cPanel
Actually now, in your cPanel, visit the file manager and then simply upload the zip file of WordPress which have been downloaded by you. As soon as you’ve uploaded the WordPress.zip file, you need to click on extract option and then extract all the files to public_html directory. (Important Note: it has to be the very first WP installation on your Dashboard). In case, it is an add-on domain, extract all the files into the directory which you’ve provided to add-on domain. For making this step simple and easy, we are going to extract all the files under public_html directory. Go to your cPanel hosting and then visit the Files and then go to File Manager and browse to public_html directory. After that, upload your WordPress.zip file. Generally, file extractor will generate a directory name “WordPress” and then extract everything under it. Because we are going to install WordPress on main domain and not on sub-domain, we will shift all the files to under public_html directory with the use of move command.
Look through to public_html > WordPress with the use of file manager, pick all the major files and then click on move option from the top and then move all the important files and documents to public_html.
Edit WordPress-Wp-config file
Another step is to write out the important database details in Wp-config file. Well, you can create a copy of wp-config-sample.php and change its name to wp-config.php. Now, just choose the wp-config.php and then click on the edit option. Under this file, there are so many things that you need to change:
Now, change the database_name_here, username_here, password_here along with the information that we have already created in Step one. Typically, Db_host remains Localhost in the majority of shared hosting such as Hostgator, Dreamhost, and Blue host. As soon as you’ve included those information, you need to click on the option save changes.
Execute WP Manual installer script
Up till now, we’ve performed all the simple settings which are required to set up WordPress manually. Now, we just need to run the installation script for WordPress, provide a username and password into your wp-admin and perform some simple settings. There are final thing which is required to be done and that is to launch and run your WordPress blog.
Visit the following url:
http://domain.com/wp-admin/install.php
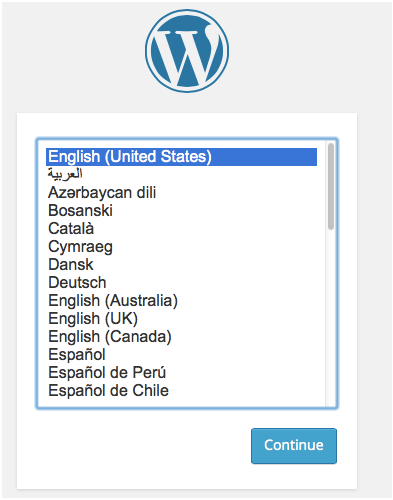
Swap domain.com together with your real domain name here. Initially pick the language of installation for WordPress:
On another screen, provide a username and password into your WP installation. Try to ignore providing admin as your username and choose a password that is hard to guess. As soon as everything gets set, then you can simply login your admin cPanel by visiting the below mentioned link:
Change domain.com with the real domain name:
http://domain.com/wp-admin
Some Popular Things to be Done After Installing WordPress
Whether or not you have set up the major CMS of the world via the auto-installer of your web hosting company or are making use of the popular WordPress five-minute Install, you are possibly eager to get begun. If you have chosen a theme, it’s possibly time to begin including content into your site. However, like the majority of things in your life, a small preparation and planning can go really a long journey. Spending some good time to work on the items will assist to ensure your website is installed and working correctly now and for the long time.
We are about to try-out a laundry-list of things in this tutorial. These are duties that you must think about performing well from the gate. For the majority of part, as soon as they are done you will not need to be afraid of then again. We’ve attempted to arrange the list so as to significance. A few items are task critical whereas other is further aesthetic. If you will be installing further WP sites in the upcoming days, make a checklist into the Google Docs for ignoring missing out anything vital.
-
Automate Your Backups
Backups are all about the restore procedure because they are related to backing up. In case anything goes bad, you will wish to be capable to restore you site as faster and proficiently as possible. You should not leave the chance of backups. Since some web hosting companies (particularly managed web hosting) will look after your backups, several shared web hosting companies will not. Understand on first day how you’ll handle your backups – think about a plugin such as BackupBuddy to finish the job. On the other hand, if you’re seeking further hands off resolution, then the WordPress backup service from the VaultPress hosted could be simply what you’re seeking. Both VaultPress and BackupBuddy are premium choices, however occasionally in life you receive what you pay for – and as far as the backup is concerned, it’s certainly great to be secure that sorry.
-
Check Your Admin Username
If you’re using an auto-installer supplied by your hosting company, make sure you don’t have a username of “admin”. It’s becoming more common for hosting companies to automatically set you up with something more cryptic, but double check just to be sure. One more great idea is to ensure that you are not making use of your administrator account for non-managerial tasks. If you are posting pages or post, make an individual account with author rights.
-
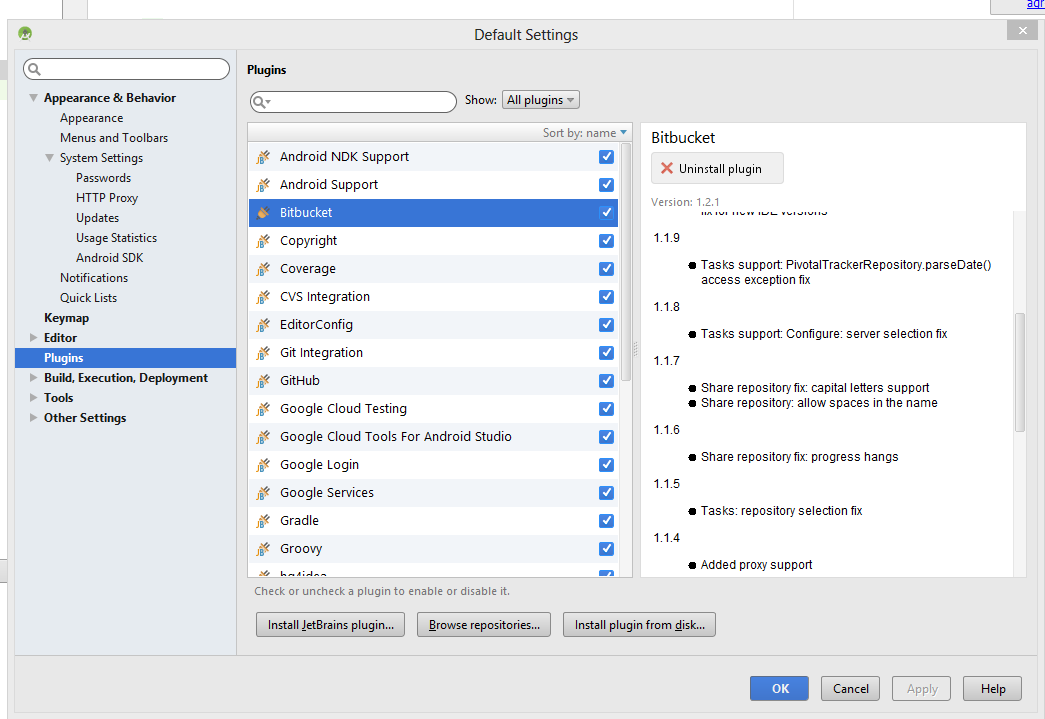
Delete Unused Themes and Plugins
As soon as you have set up your favorite theme and all of your needed plugins, it is a wonderful idea to revisit your admin cPanel and remove delete any themes or plugins that you are not making use (like Hello Dolly, good-bye). We know that several people who are new at WP finish up trying out with one or more than one free themes. After that, they understand it might be simpler to spend some money on a premium theme – which help you to save loads of time in the procedure. Old plugins and themes that aren’t updated can include future safety vulnerabilities and it just takes a couple of time to remove from your WP installation.
-
Install Crucial Plugins
With each installation of WordPress, there are loads of plugins that you can choose safely and set up without even considering it. The particular plugins we have connected to are only a little inclination thus you may have a challenging plugin that you would choose to use.
-
Set Up Your Premium Theme
WordPress comes all set to roll with some stock themes, and all of them are quite good. But, as compared to the premium themes, they leave loads of things to be desired. If you are on Elegant Themes, we are about to think that you have selected one of the several accessible choices from the Gallery. There are so many reasons behind why making use of a premium theme is a nice idea, and one of them is additional functionality feature. Things such as installing your homepage, employing a favicon and custom logo, and custom shortcodes will really make the procedure of arising and running simpler.
Another wonderful reason to think about a premium theme is the customer support. If you have already registered for Elegant Themes, just discontinue by the support-forums to experience the advantages of premium support. Lastly, think about the advantages of employing a theme that has experienced an appropriate security audit and the same is also depending on frequent updates. Individual themes are attacked more frequently compared to the WordPress core. Making use of a properly secured premium theme typically implies that you are reducing the danger of yielding to a safety risk.
-
Update the Title of Website
Since one of the most significant components of your site, you will need to ensure that your website title is correctly completed. Though each webpage on your website must have a suitable title, the one we are mentioning here is the title of the website. You can easily find this option under the Settings options and then in General. When a person visits the homepage of your website or discovers your website through the search engine result page, the website title is typically what they will see. Also, it can assist to inform Google what your site is all about. Just try to follow the best practices, and remember to keep your website title approximately 55 characters long. Also keep in mind that your website title should be specific and descriptive and not spammy. The example of a suitable website title “Dave’s Barber Store | Portland”. An example of irrelevant website title would be “Affordable Haircuts, Cheap Haircuts, Women’s Haircuts, Men’s Haircuts | Portland, OR”. Just spend some time to search the Internet and then you will find the spammy website title that get worst ever before.
-
Update the Timezone
Similar to the settings the date and time on your mobile device, you will wish to do the similar thing in WordPress. Integrated apps, scheduled posts, and plugins will all depend on the truth that your time zone is set up appropriately.
-
Remove the Default Content
Well, there are some portions of dummy content set up with WordPress that should be removed. A few web hosting firms that make use of auto-installers also give exgtra content as well what accompany WordPress. For instance, SiteGround as well as other providers frequently have pre-installed text widgets and pages that endorse their services. Ensure that you check widgets, comments, posts, and pages for anything not connected to your work.
Conclusion
WordPress gives an ultimate interface for installing a website in just a couple of minutes. This reality can be observed because it is the most selected platform for installing dynamic E-Commerce sites. The process we have discussed above rarely takes approximately 5 to 10 minutes. After the successful installation of WordPress, you can easily download premium WP themes from MyThemeShop. After setting up your preferred theme, you can begin to put up posts and content on your blog. Keep in mind to create an About Us section for your site. Sumit and authenticate your site on various search engine platforms such as Yahoo, Yandex, Bing, and Google.
